
Creative Long Exposure Photography Ideas
Looking for a new challenge in your photography? Hit a creative block? Or maybe you just want to expand your skill set?
Maybe it's time to try your hand at some long exposure photography. Here are some ideas and how to do them.
Panning Photography
Panning photography is a popular slow shutter speed technique - simple to do and the results can be visually striking when you get it right.
Panning shots, in a nutshell, are photographs where the moving subject is relatively sharp, while the background or surrounding objects are blurred to give a strong sense of motion to the image. Predominantly used on vehicles of all kinds, from cyclists to cars, trains, buses and even runners.
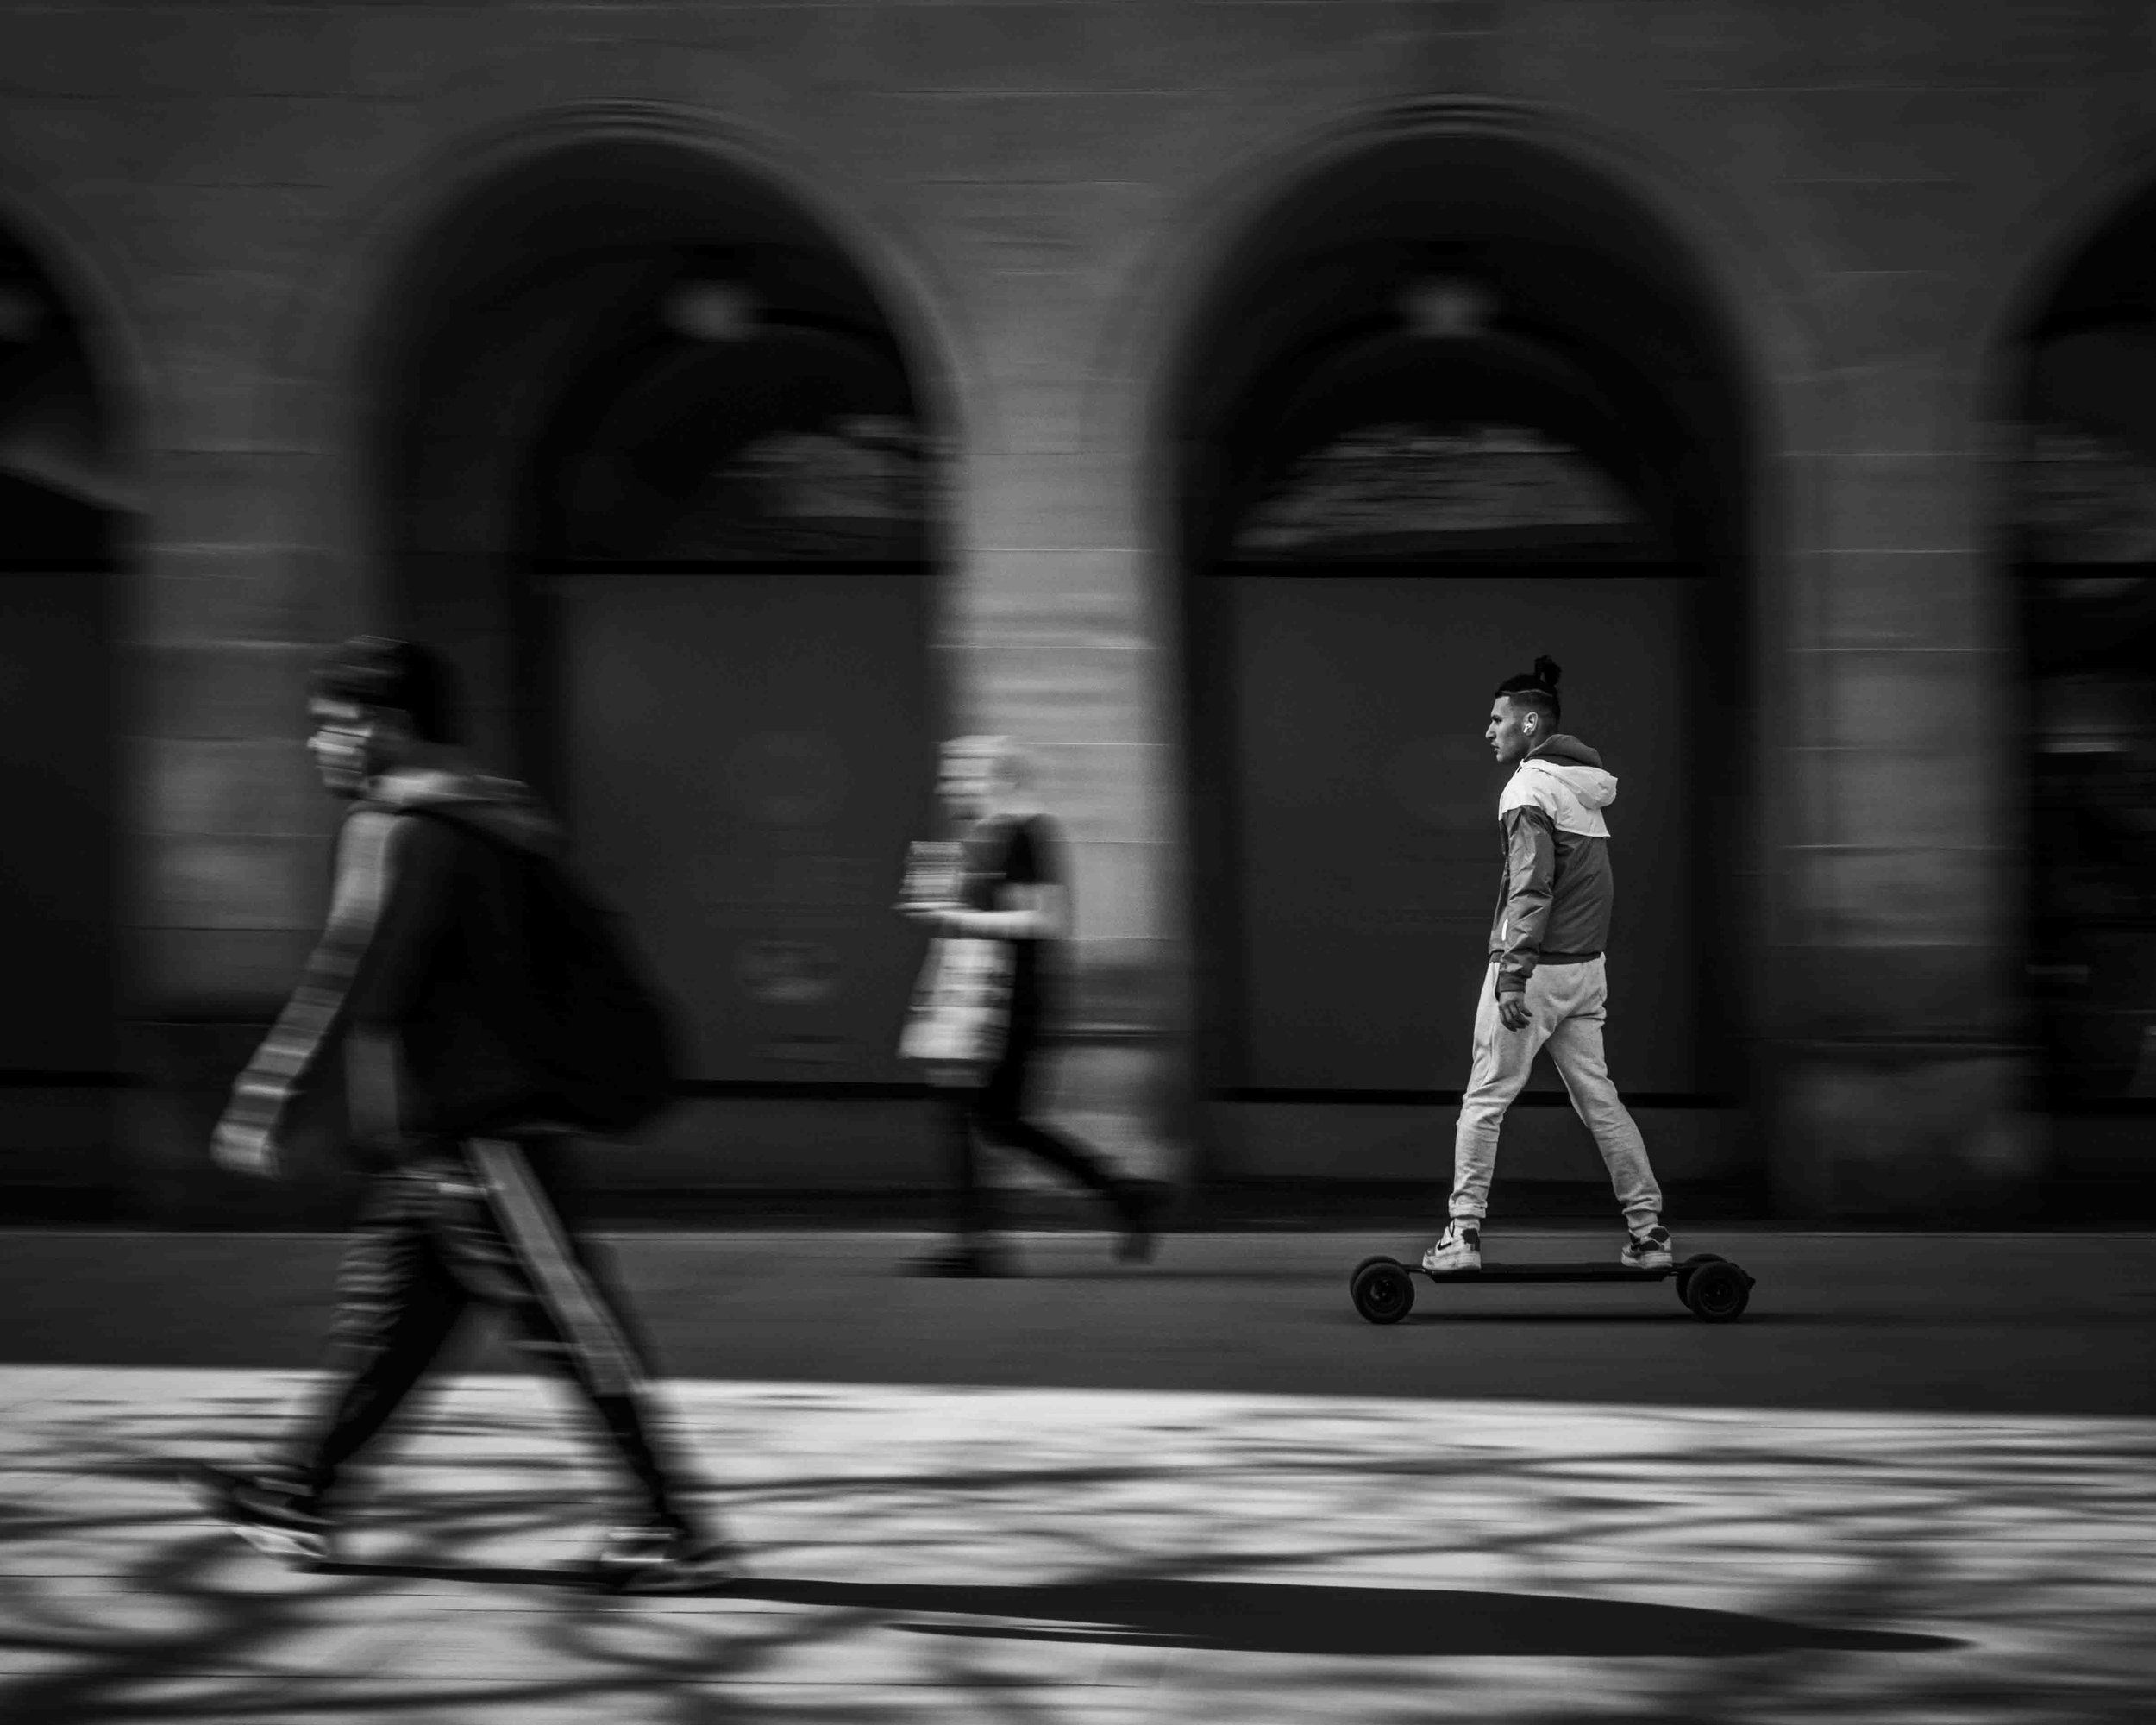
Although this style of photography is primarily seen in street photography, it can give your client work a creative edge too - anything from sports to children running around at weddings.
How to shoot panning photography
Try using a shutter speed between 1/30 - 1/60 second. This slower speed will add the effect you want to the background as you ‘track’ the subject.
What you are looking to do is to follow the movement of the subject as closely as you can as they pass by, while simultaneously holding the shutter button down to fire off a succession of images. Imagine you are filming them on video, and you need to track them as smoothly as they do on Hollywood movies, keeping the subject in the same place as much as possible as you track them.
Try having continuous autofocus on, continuous shutter on, and if you’re not confident enough to control the aperture and ISO, try shooting in TV or shutter priority mode so the aperture and ISO are automatic.
Tip:
For a more successful hit rate of good images, try tucking your elbows into your sides, and follow the subject's movements with your body, instead of just your arms. This will create more stability and accuracy.
Stabilised Slow Shutter Photography
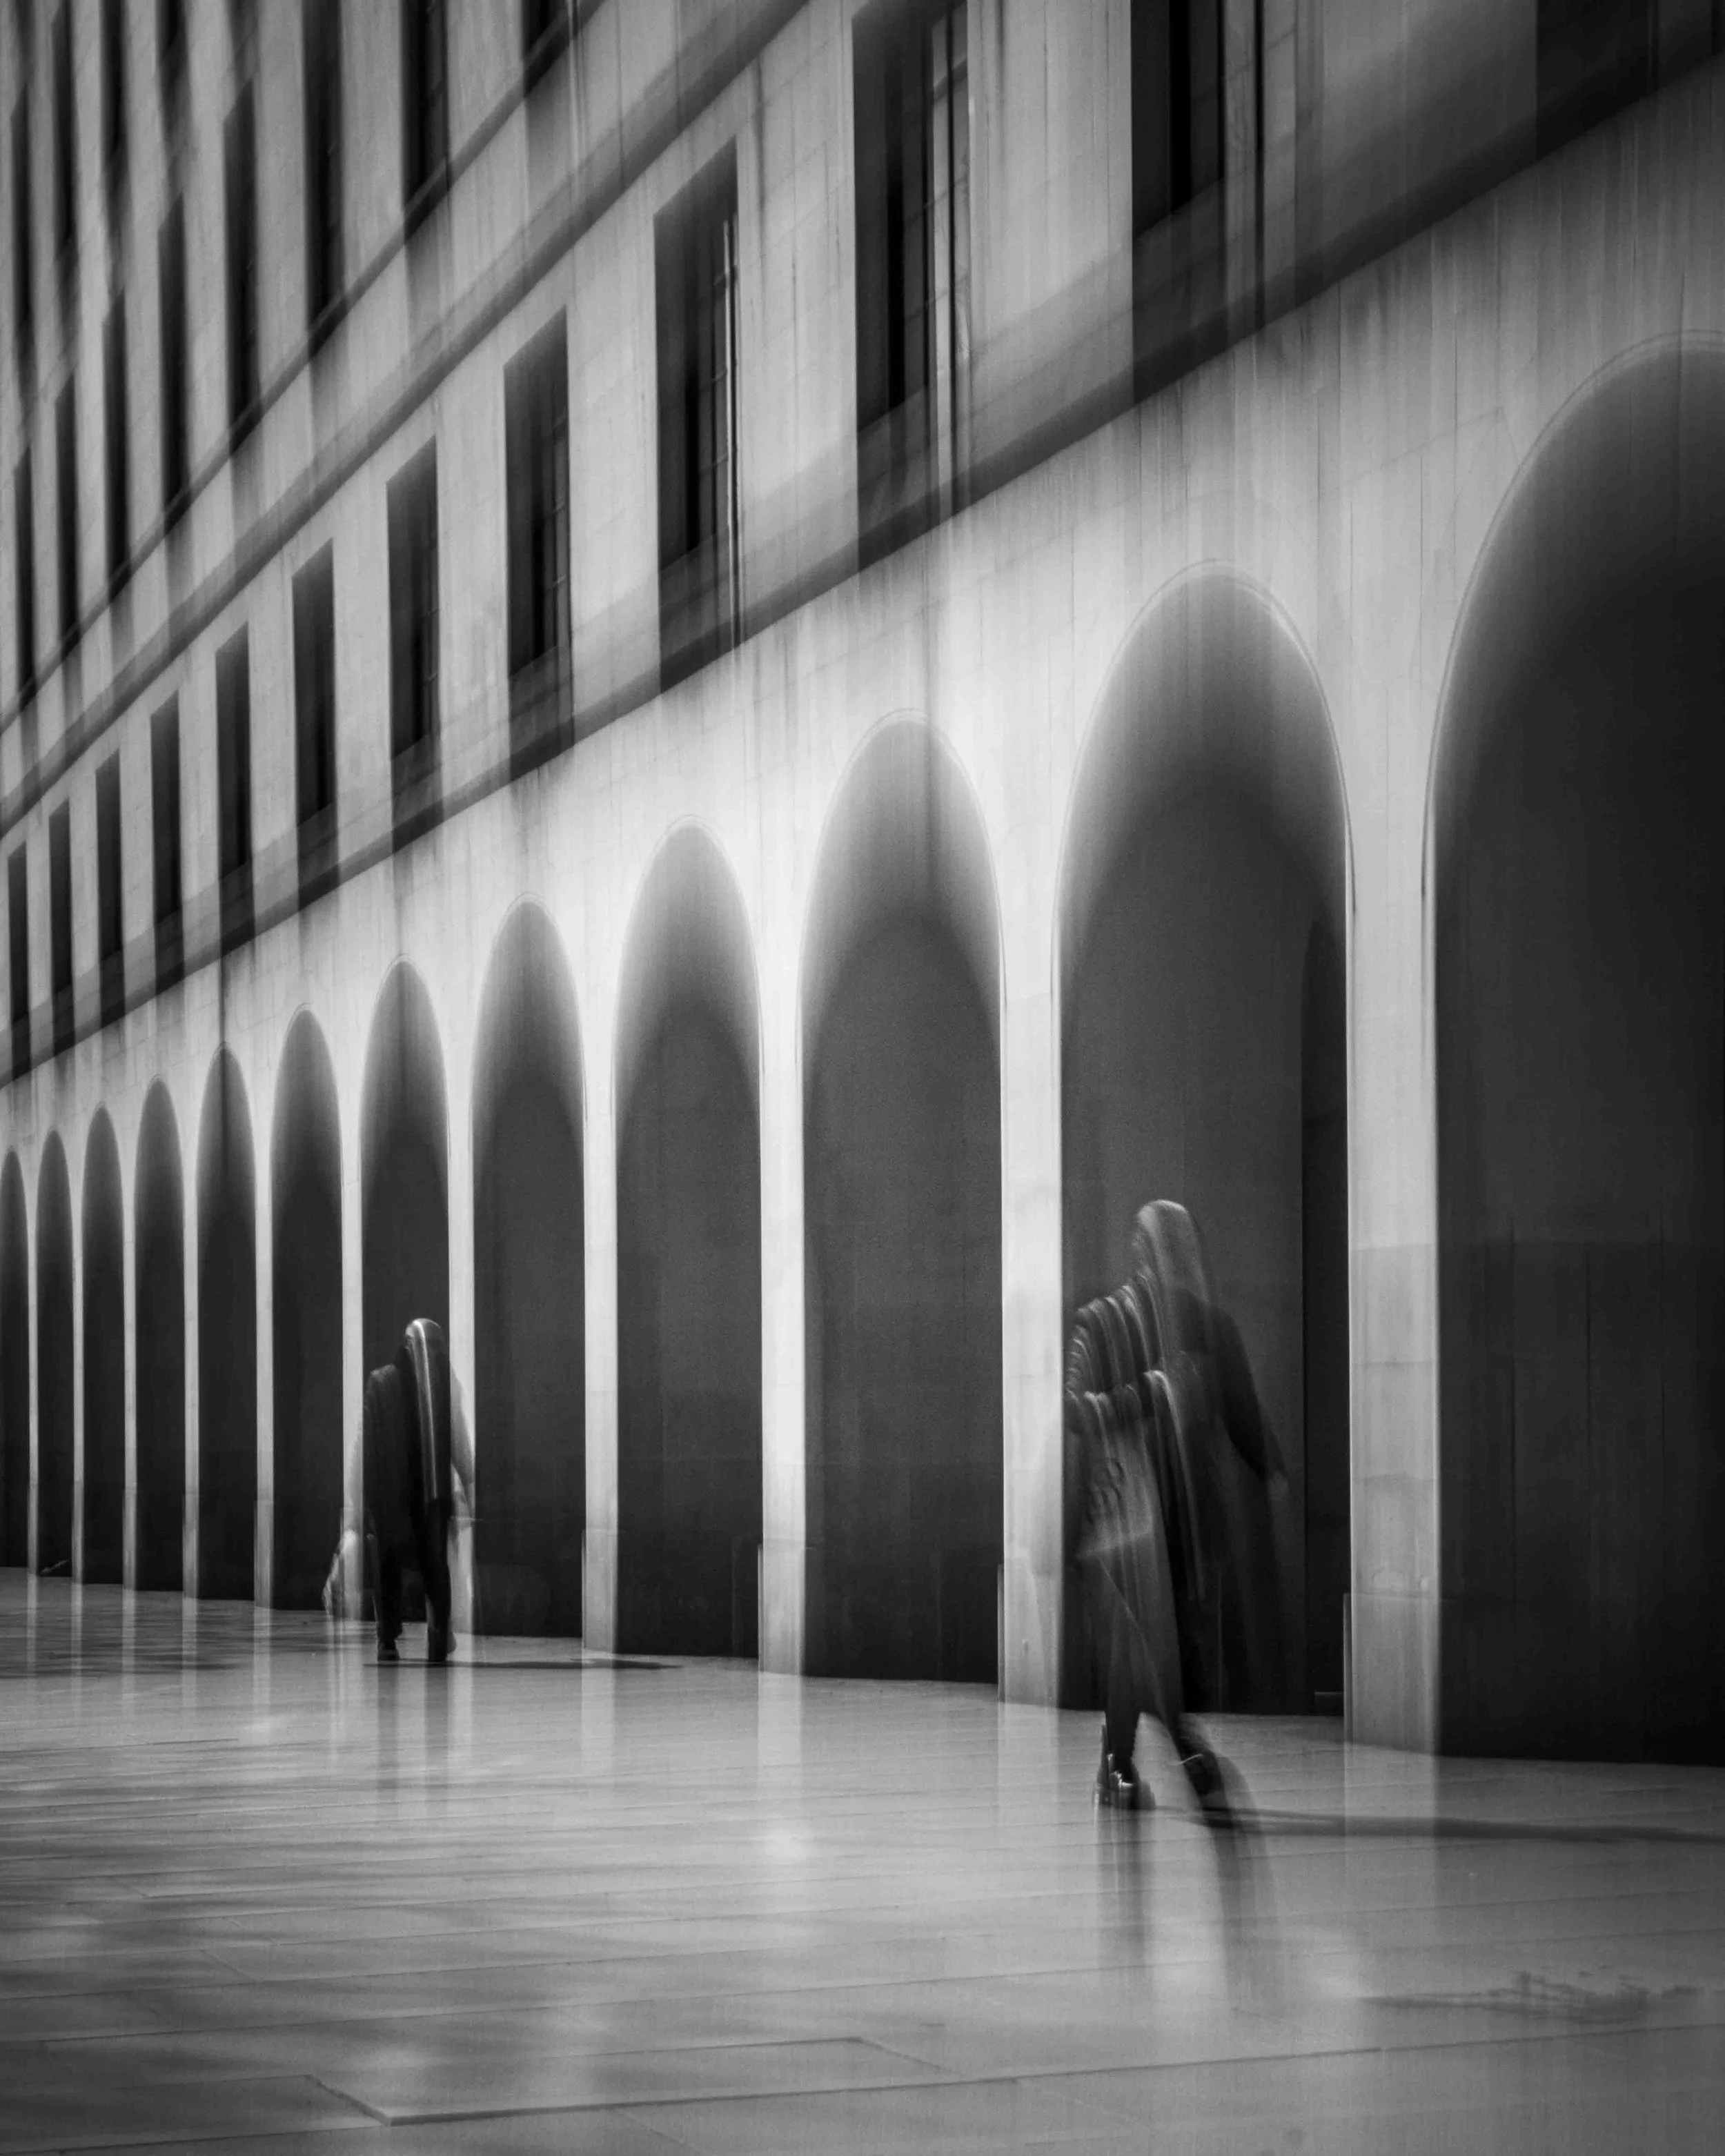
Almost a reverse panning shot, the background is frozen, and you let life move within the scene, creating an impressionistic blur to its moving elements. Incorporating an intentionally slower shutter speed to street photography can create a sense of time passing, and capture the busyness of a scene.
This technique is also helpful if you want the people within your photograph to be unidentifiable - for legal or personal reasons - and is often used in commercial photography.

How to shoot stabilised slow shutter photography
The most important thing you will need for this type of shot is stability. You want the scene to tack sharp. The easiest way to achieve this is with a tripod, but image stabilised lenses and cameras with in body image stabilisation can do the job handheld too. I can get a handheld stabilised shot of up to two seconds by combining lens IS and camera IBIS. Modern camera technology has come a long way in recent years, and is responsible for the growing popularity of this style.
Shutter speeds can vary between 1/13 - 2 seconds. Experimentation is key here, but longer shutter speeds tend to be better for large crowds, and 1/13 is great for single subjects where you want the person walking to retain shape and form but also be blurred.
With the slower shutter speeds, you may notice that your images are simply far too bright and over exposed; no matter how high you have the aperture number and how low the ISO is set. The solution here is the trusty ND filter to reduce the amount of light entering the camera.
Tip:
Try looking for scenes where moving objects are mixed amongst stationary objects, like the one below.

Light trails Photography
Similar to the Stabilised Slow Shutter technique above, the camera and scene remain as still as possible; but for light trails you often want much longer exposure times, and so a tripod is a must.
Light Trails can come from cars, other vehicles, fairground rides and anything that moves with lights. In most cases the longer the shutter speed, the more lights are added or incorporated into the image.
How to shoot light trail photography
Shutter speeds between 2 and 30 seconds. Choose your shutter speed based on how long the lights trail through the image. For example, if you are wanting to capture the light trails from a passing bus that takes three seconds to pass you, there’s no reason to be taking a thirty second exposure. Try a three second or even a five second shutter speed so you don’t miss anything.
Just like every other style on this list, you could make life easier by having the camera in shutter priority mode, but if you like to have full control of the exposure triangle then there are a few points to consider.
The majority of light trails are shot at night and therefore you want to minimise noise as much as possible. Keep an eye on your ISO and - as a very general rule of thumb - try to keep it below 1600. Regarding aperture, if you are really struggling with noise, you might want to open the aperture fully to the lowest number, allowing as much light as possible to enter the lens, but if you want street lights and other lights to have diffraction spikes, you will need to close the aperture with a higher number.
If after that you are still struggling with the image being too dark or noisy, add a few more seconds to the shutter speed to allow more light to hit the sensor.
The process for light trails is the same as all the beautiful long exposure waterfall pictures you see cluttering instagram. The only difference with shooting during the day, is you will need to use an ND filter to control the over exposure that comes with shooting with very long shutter speeds. You might also want to set the ISO lower and increase the aperture number if you are in full manual mode.
Tip:
Pressing the shutter button can introduce a little shake into your photo making it less sharp than you would like. Try using the camera’s built in self timer or an external intervalometer to negate this.
Intentional Camera Movement
Intentional camera movement, often abbreviated to ICM, is undoubtedly the biggest challenge on this list. It’s time to finally put away the tripod because this type of long exposure needs zero stabilisation.
ICM is the art of moving the camera while the shutter is open, making the scene abstract or impressionistic. With a combination of different movements, techniques and shutter speeds, a range of effects can be created; from subtle painterly blurring, dragging light and structures through an image, to extremely abstract and even double exposure type effects.
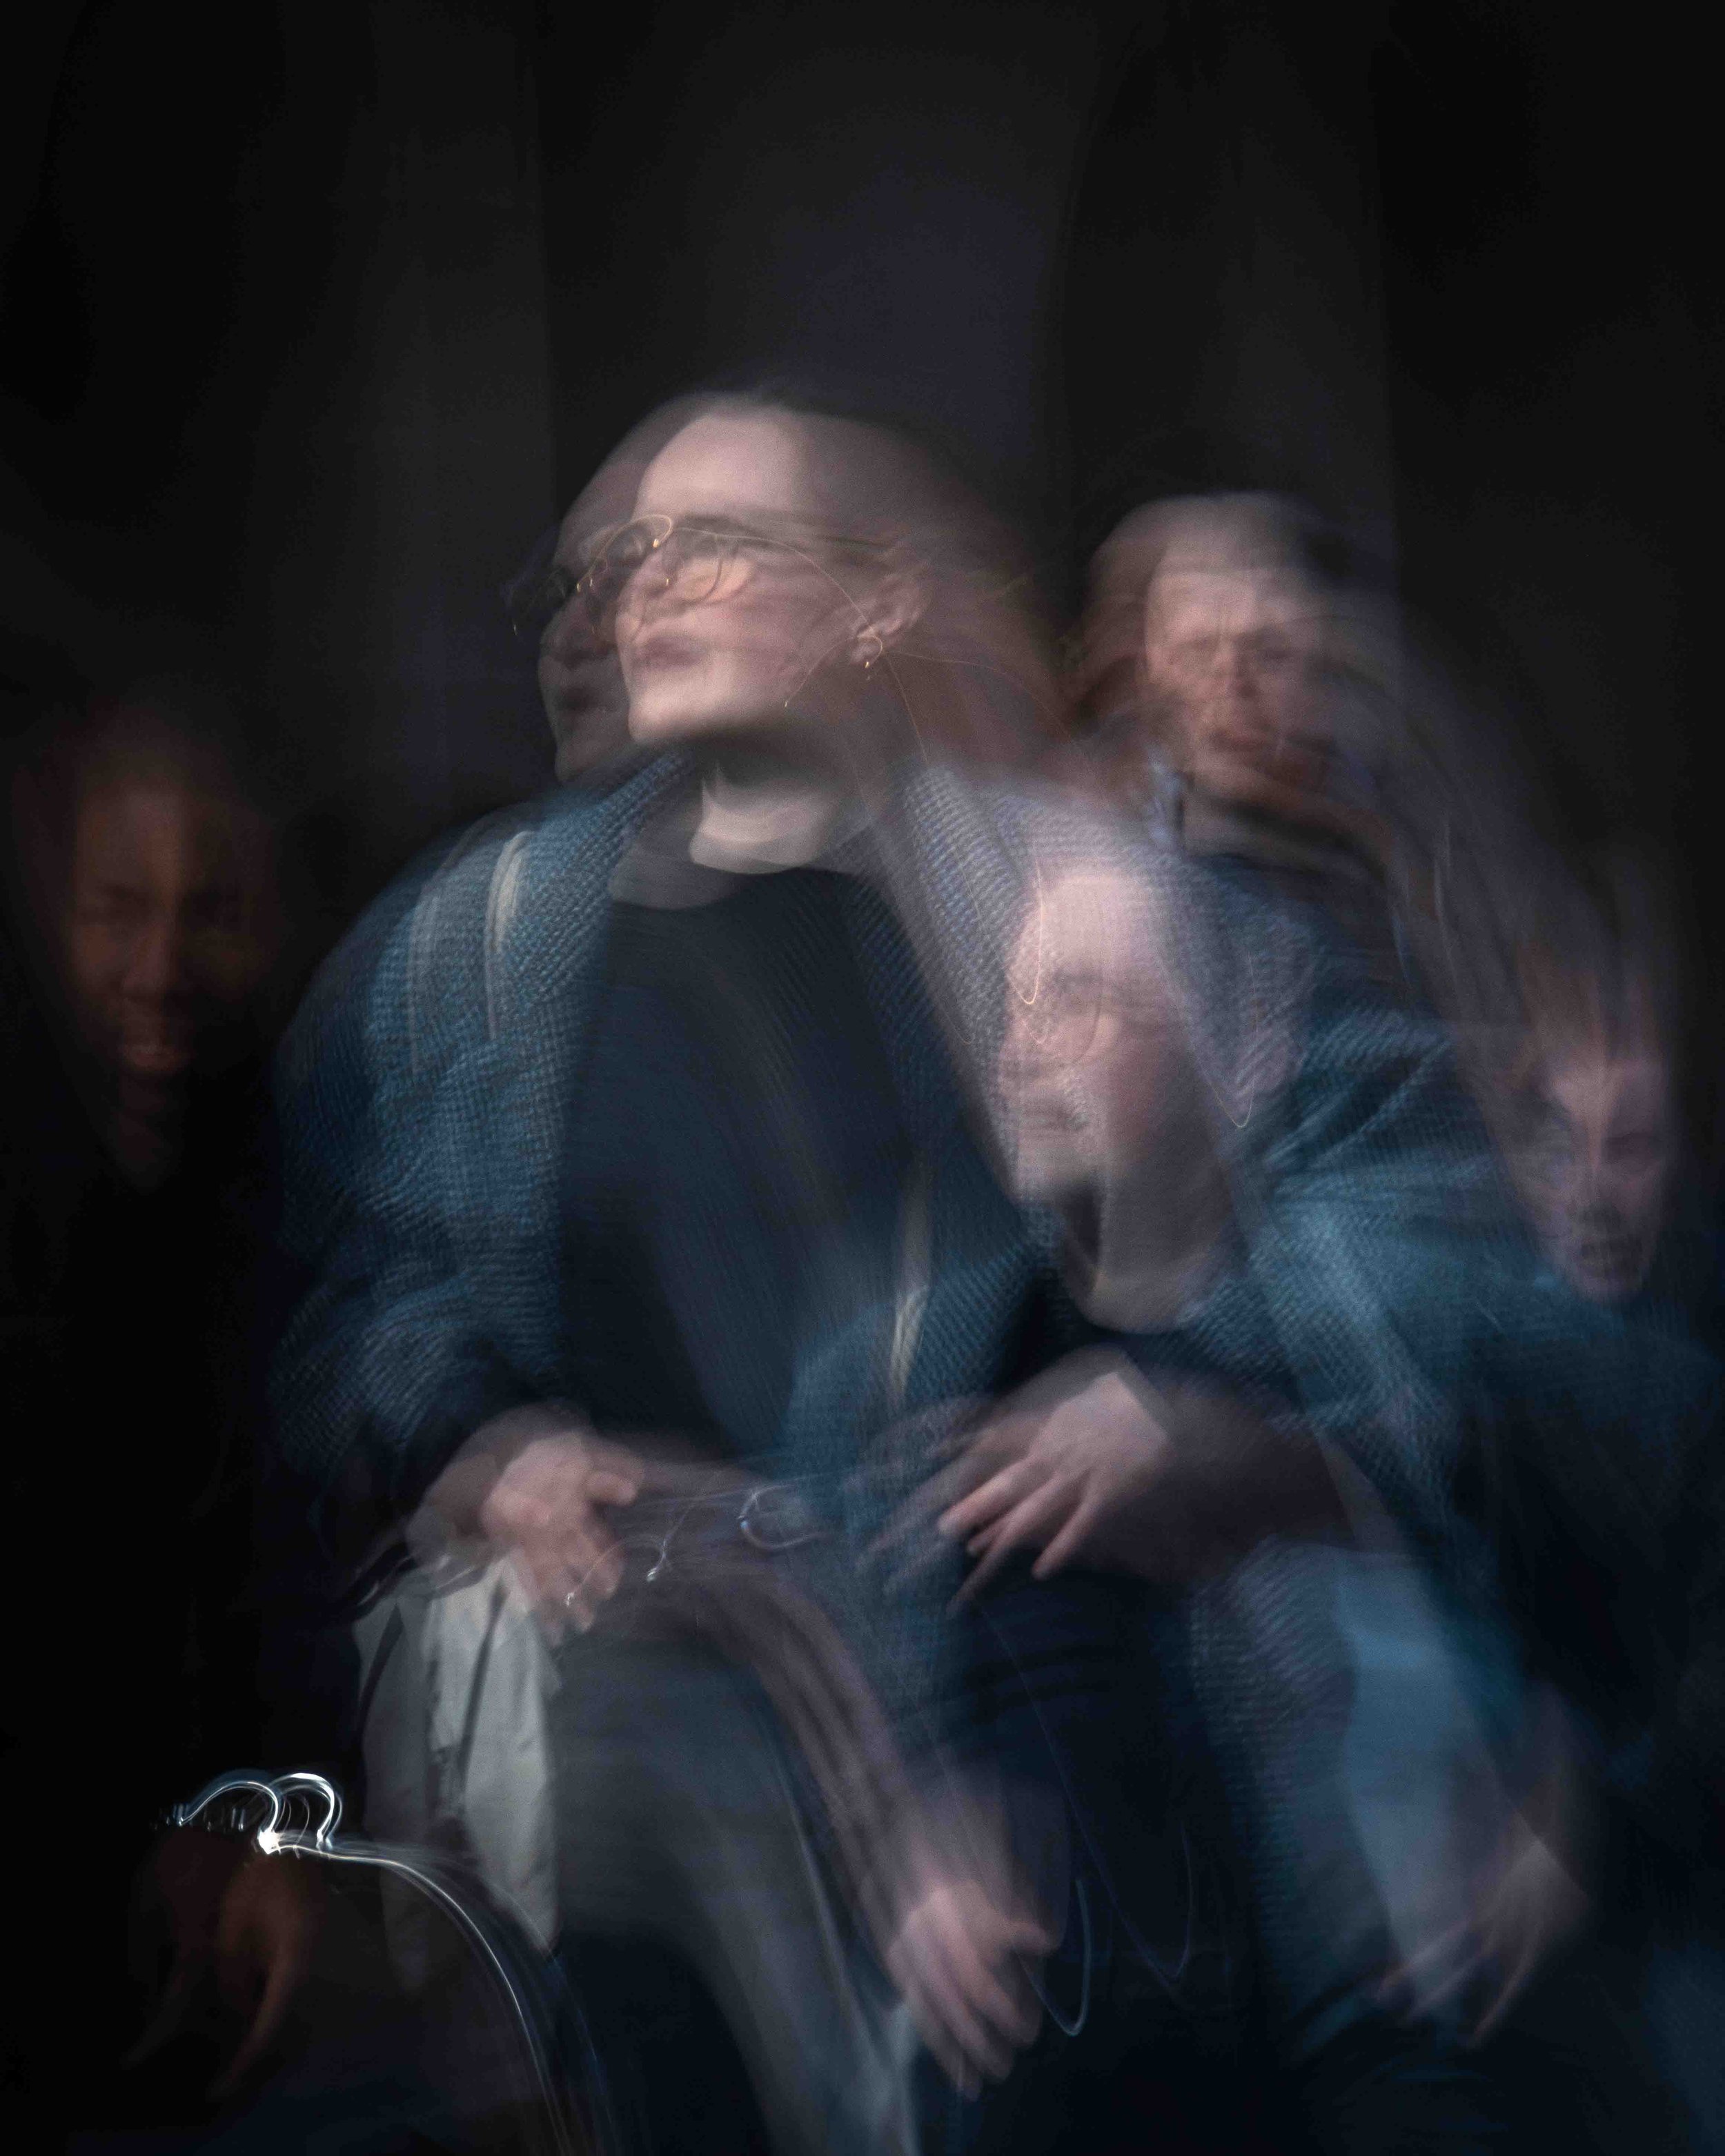
How to shoot ICM photography
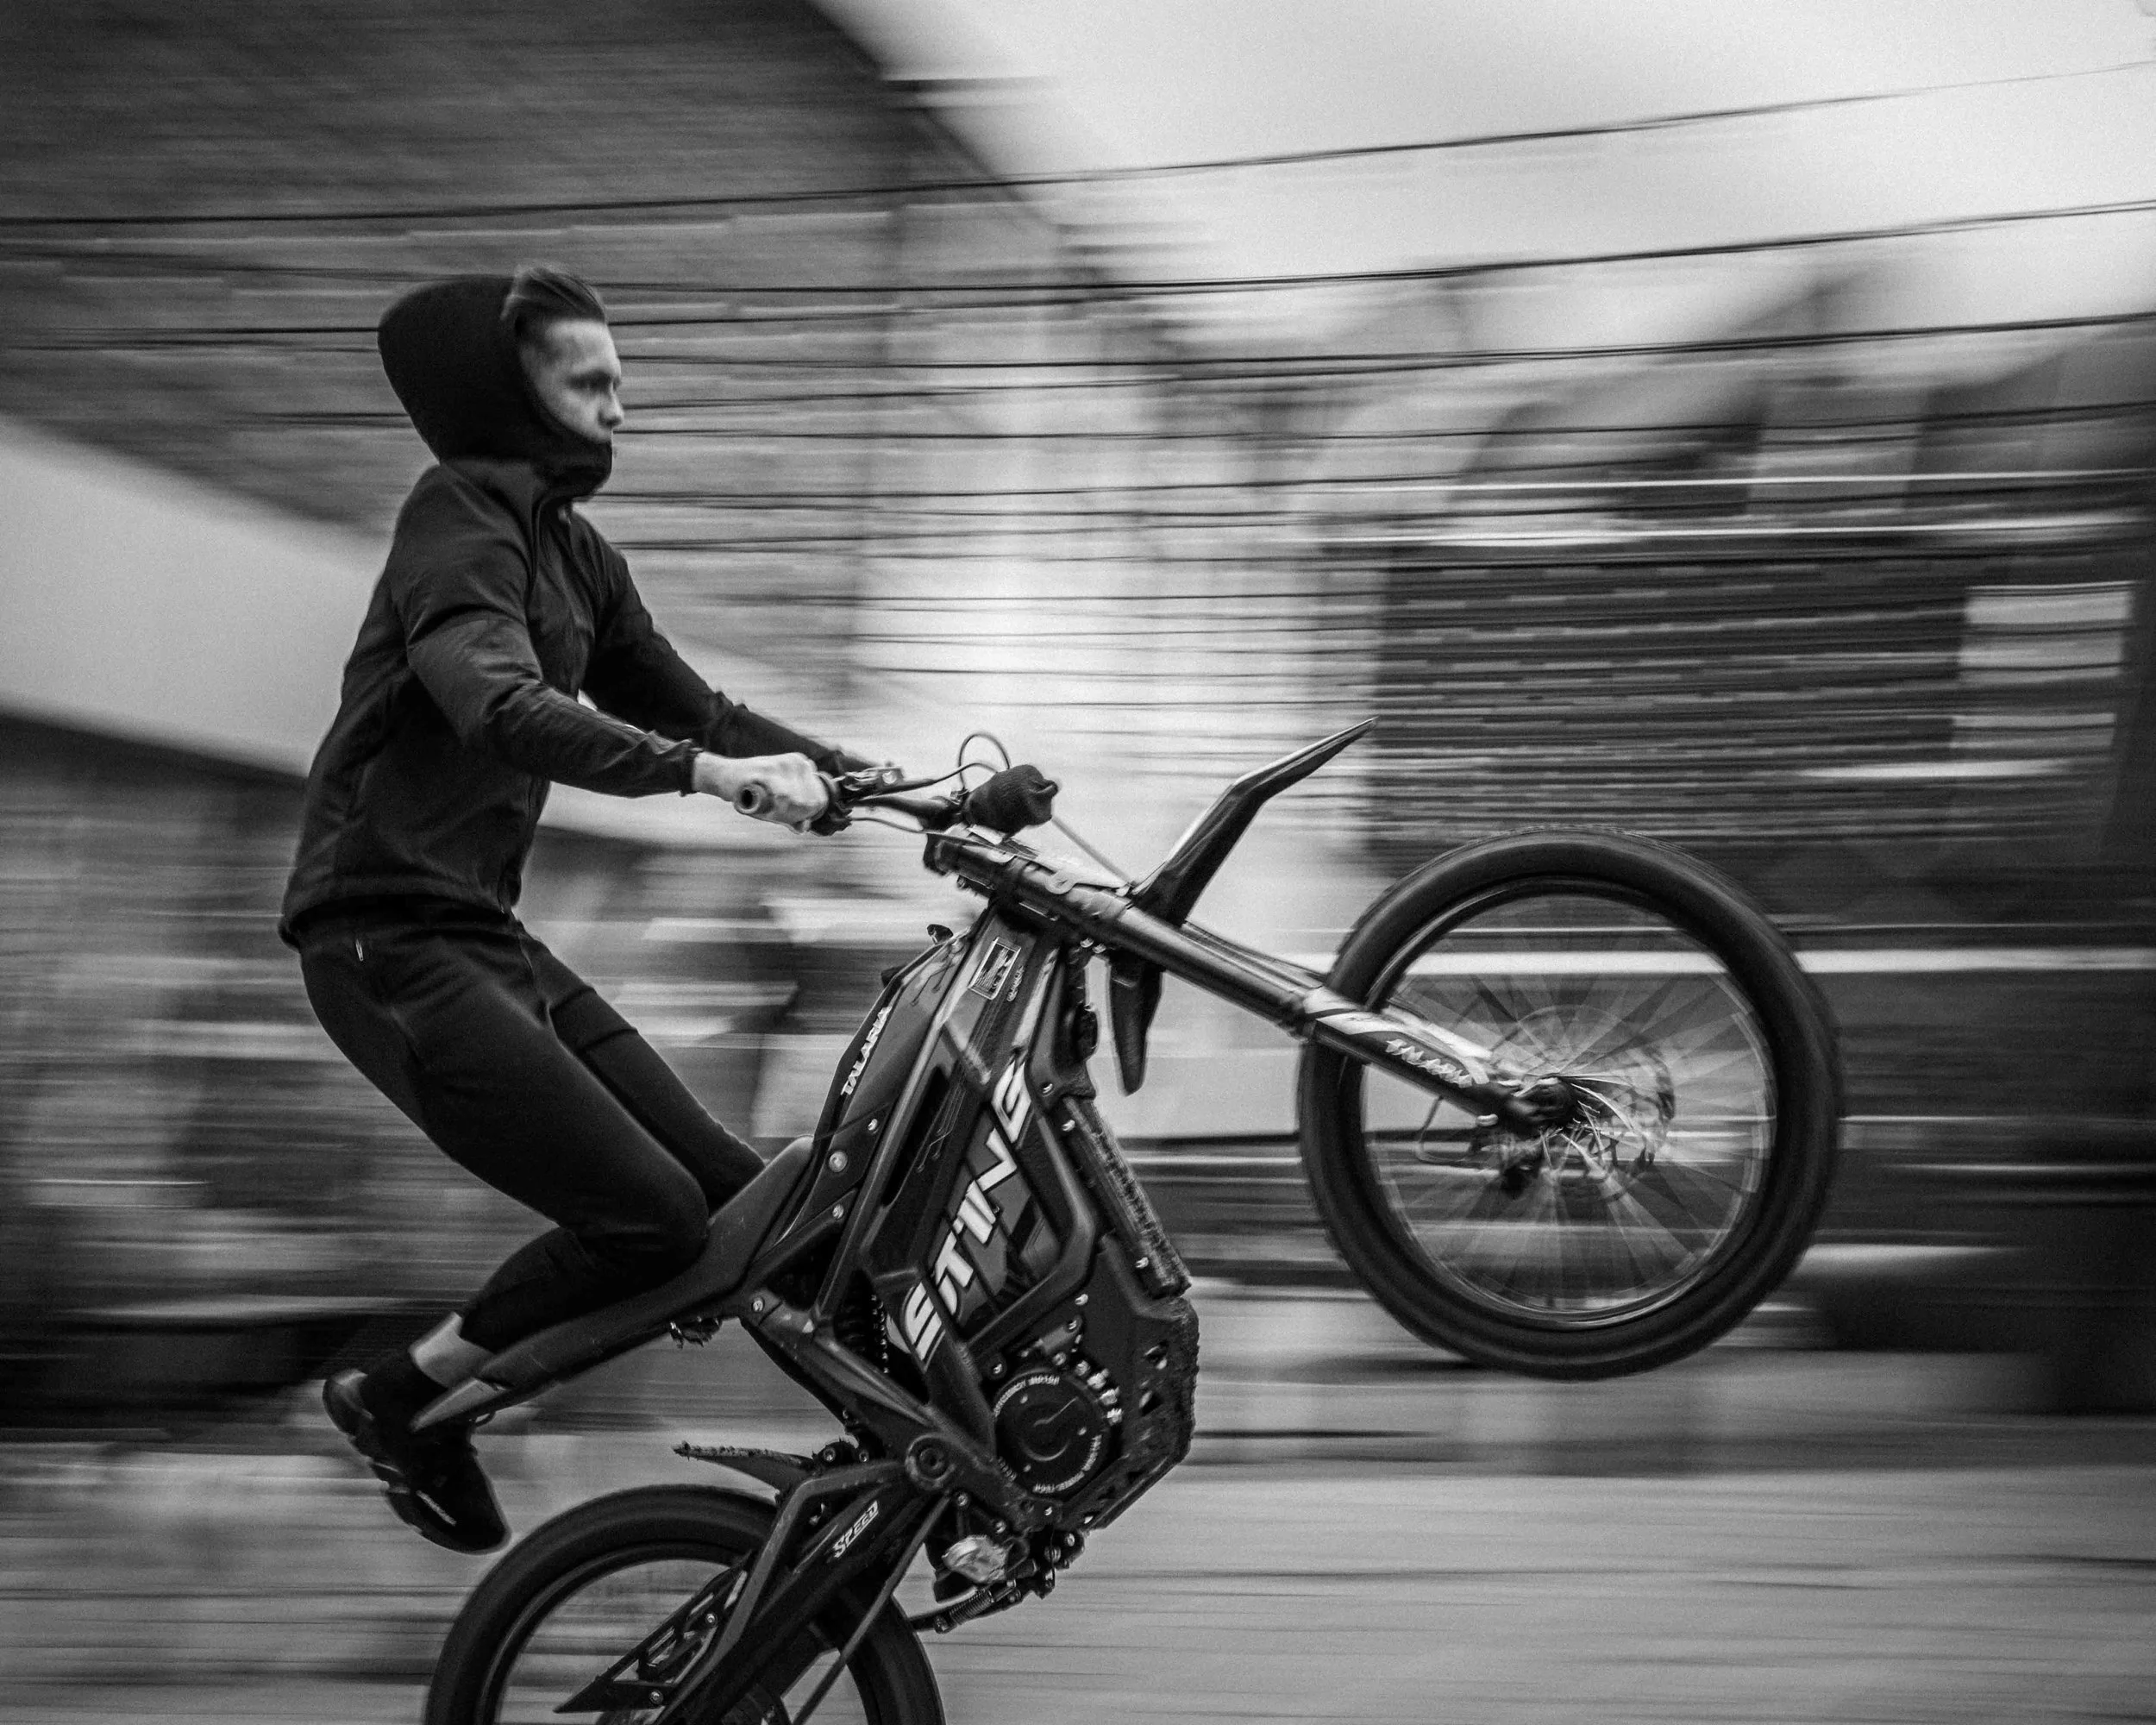
Shutter speeds between 1/4 - 2 seconds. Choosing your preferred shutter speeds will depend on experience and desired effects. Shorter speeds will generally retain more details while longer speeds will create more abstraction.
When it comes to camera movements, experiment until you find something you like and then try repeating it. You will quickly notice how different movements affect the image differently - downward movements drag the light from the sky down into the scene, circular motions tend to soften a scene and sharp up/down/left/right movements work better with architecture.
The trick here is to show that the camera movement was indeed intentional. Waving your camera around wildly and posting the first picture that comes out might just look like you slipped while trying to take a sharp image. You want the movement to ADD something to the image, not detract from it.
If your images are looking overexposed, a ND filter will be needed just like most other long exposure styles. If you are looking for a camera that has a built in ND filter that automatically turns on and off when needed, why not check out my write up of the Sony RX100.
Tip:
If you are using a zoom lens, try zooming in or out too while the shutter is open. That’s what I did to create the image below. Another tip is to try holding the camera steady during the first half of the shot before moving the camera. This can ‘burn’ the details into the image before adding the abstraction.
